How to use Copicake on Make.com (Integromat)

Hi everyone, like what we mentioned last time. We already released a #NoCode solution on Make.com (called Integromat previously) and in this article, I am going to show you how to use it for your own project.
Step 1: Create a new scenario and add Copicake as a module
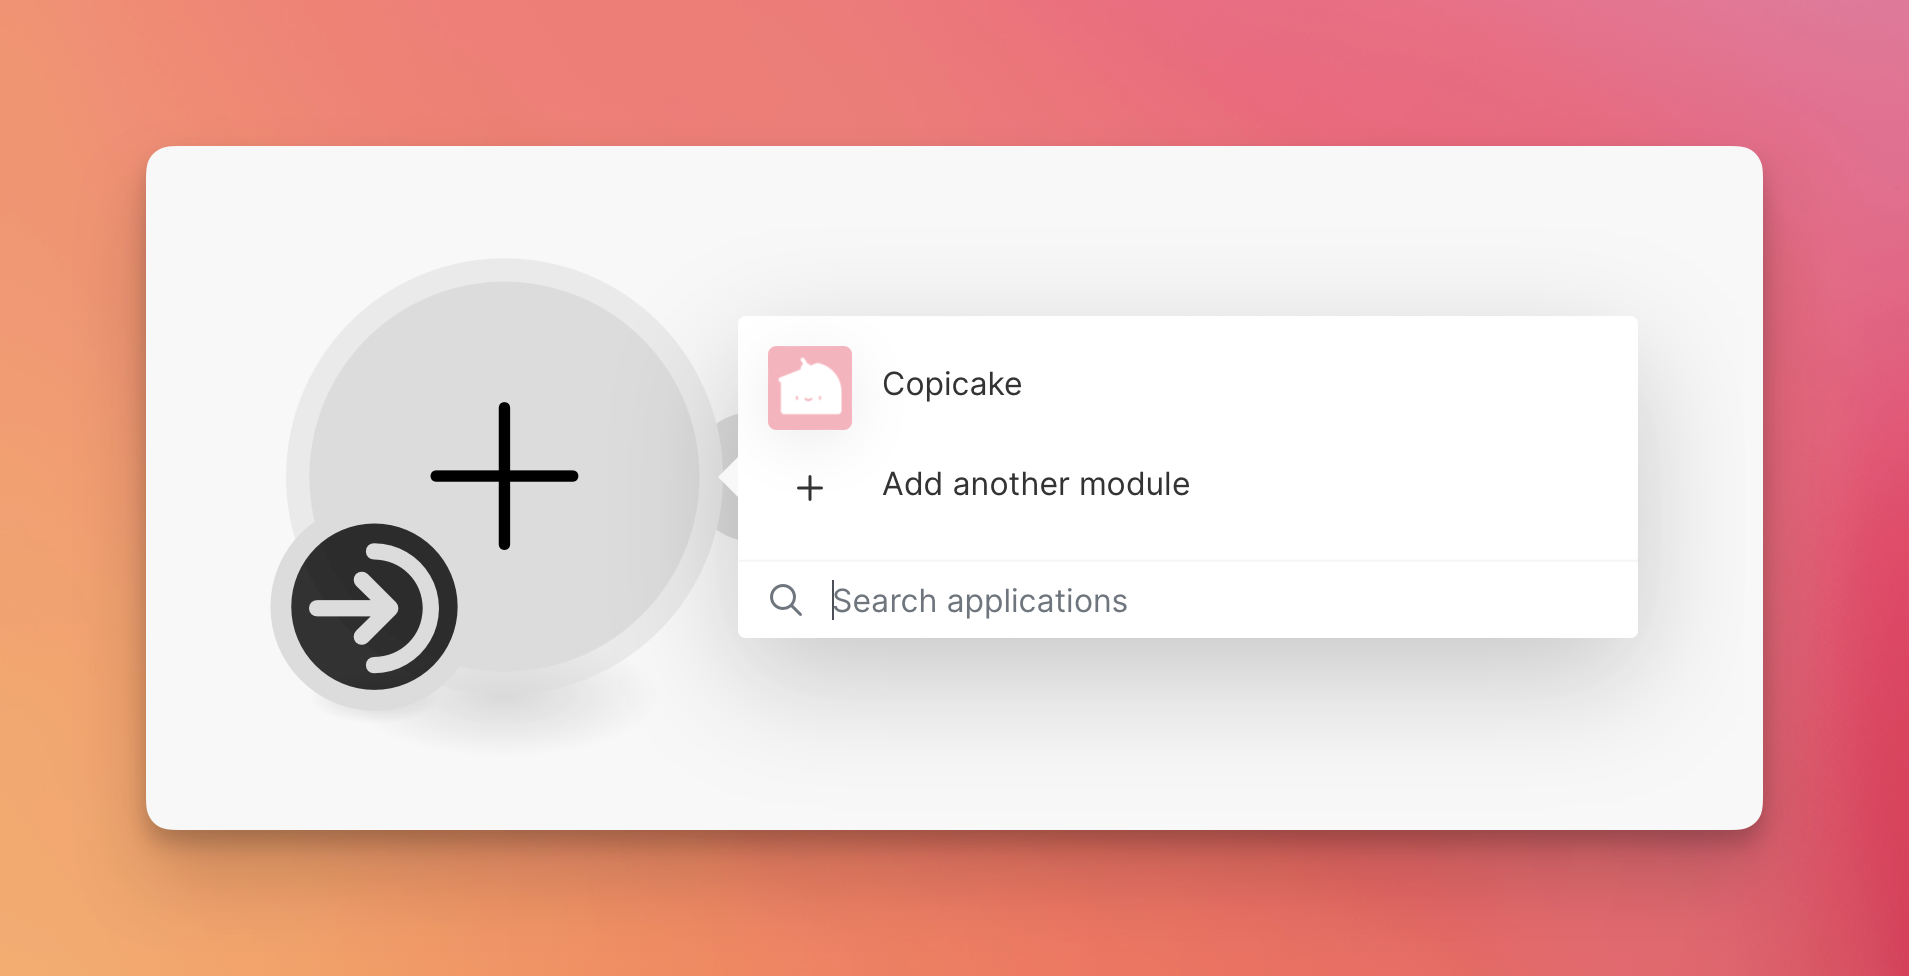
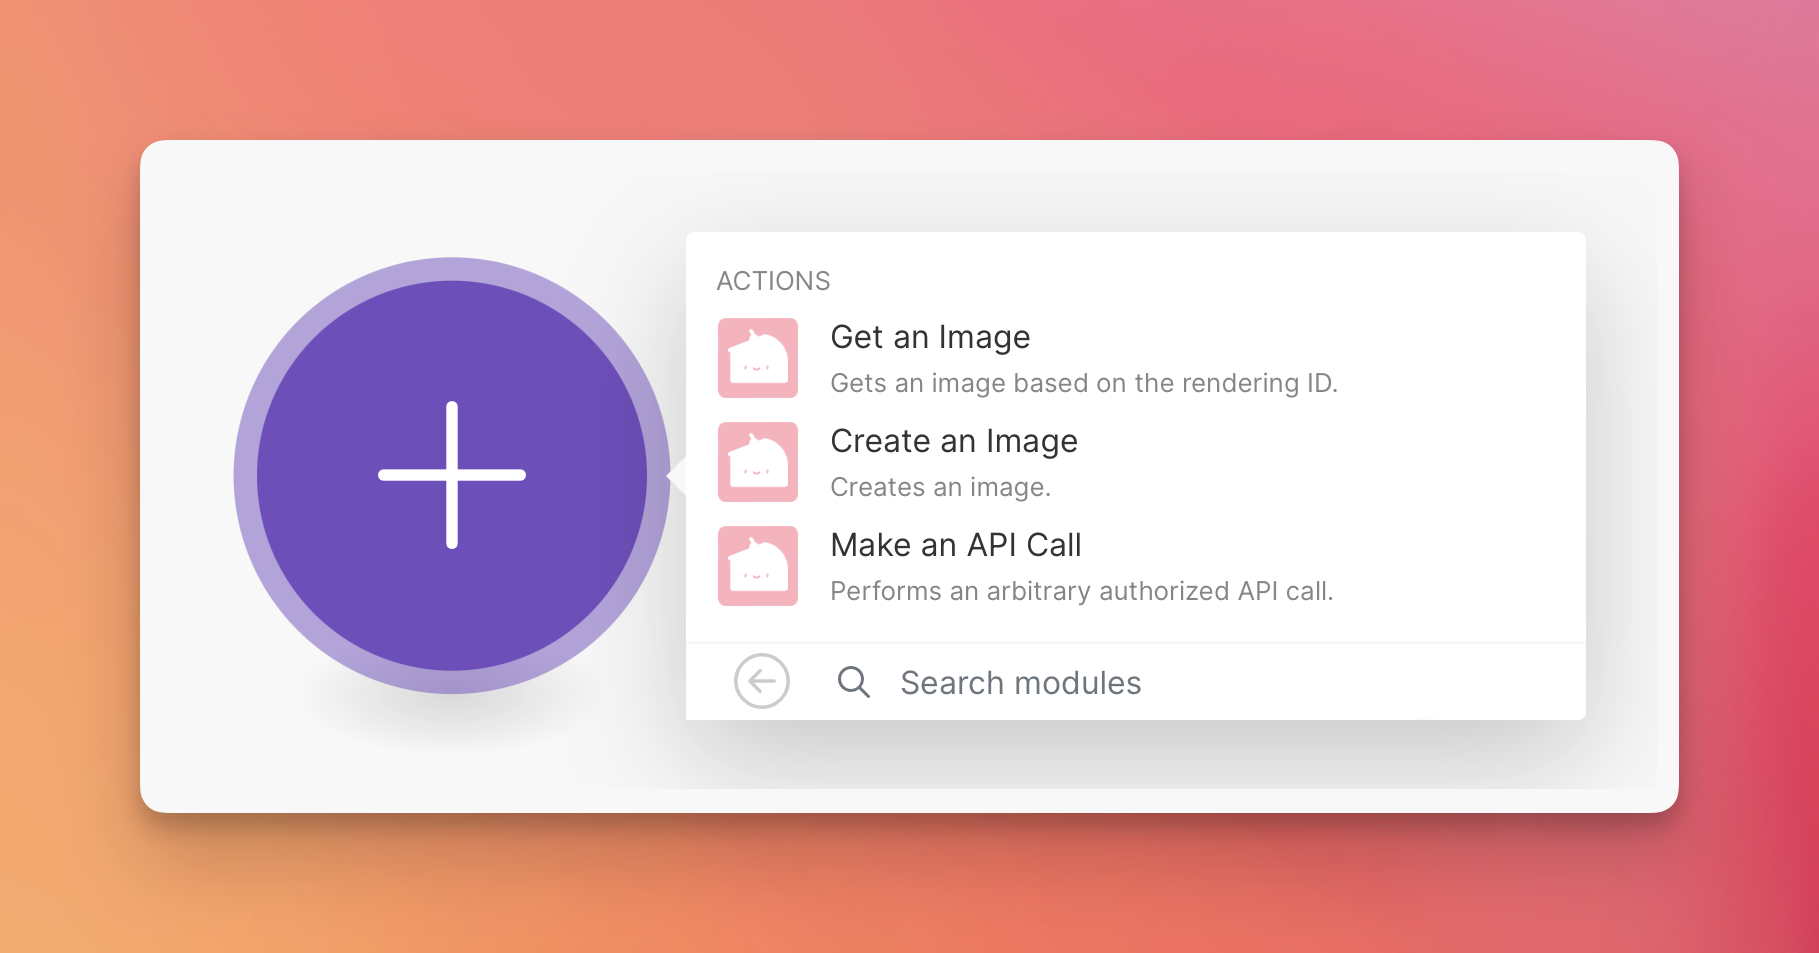
As you can see, we have 3 modules for Copicake, which are:
- Get an Image
- Create an Image
- Make an API Call
and we only need the first 2 actions in this tutorial.
Step 2: Set up connection
P.S. If you already set up your connection before, you can skip this step.
Here, I assumed that you already have a template on Copicake. If you don't have one, please go to Copicake and create one. And we are going to use that template as a base to create an image.
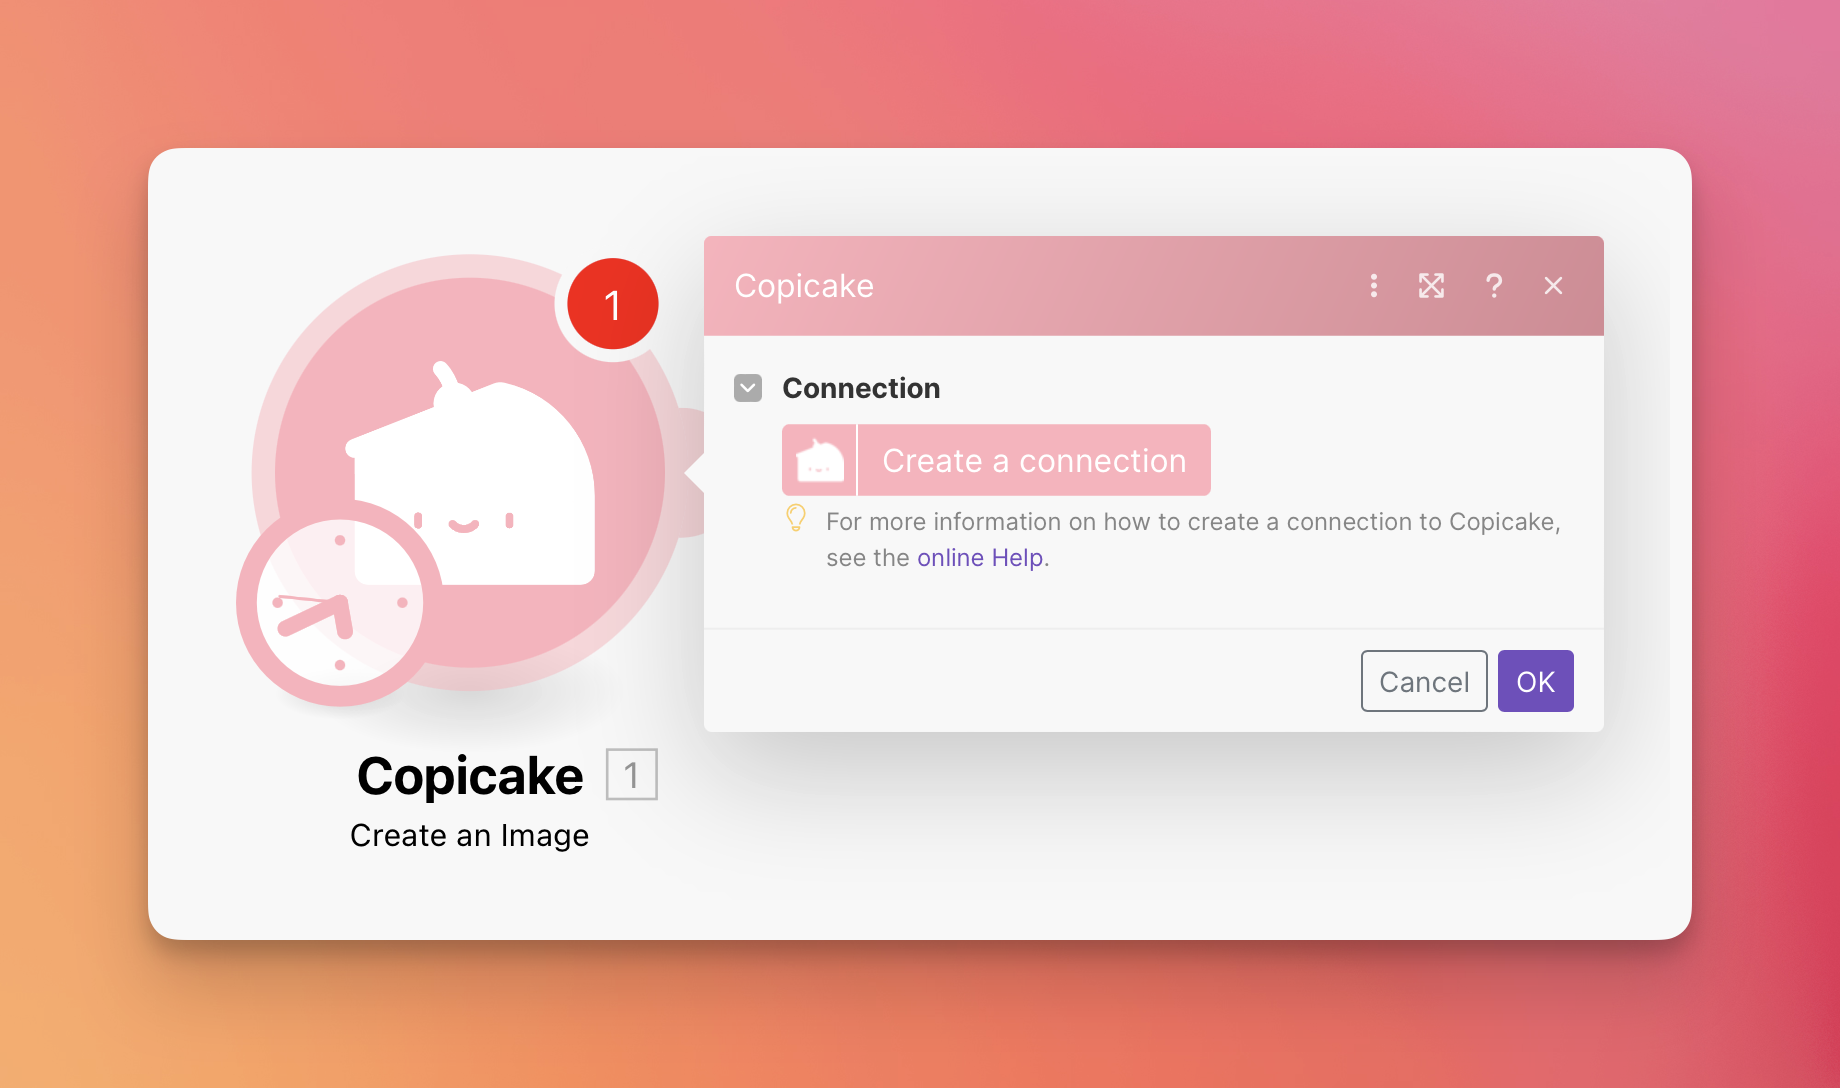
If it is your first time to use our module, you'll need to connect your Copicake account to Make.com first by clicking "Create a connection" button. After clicking, you'll see a popup window like this:
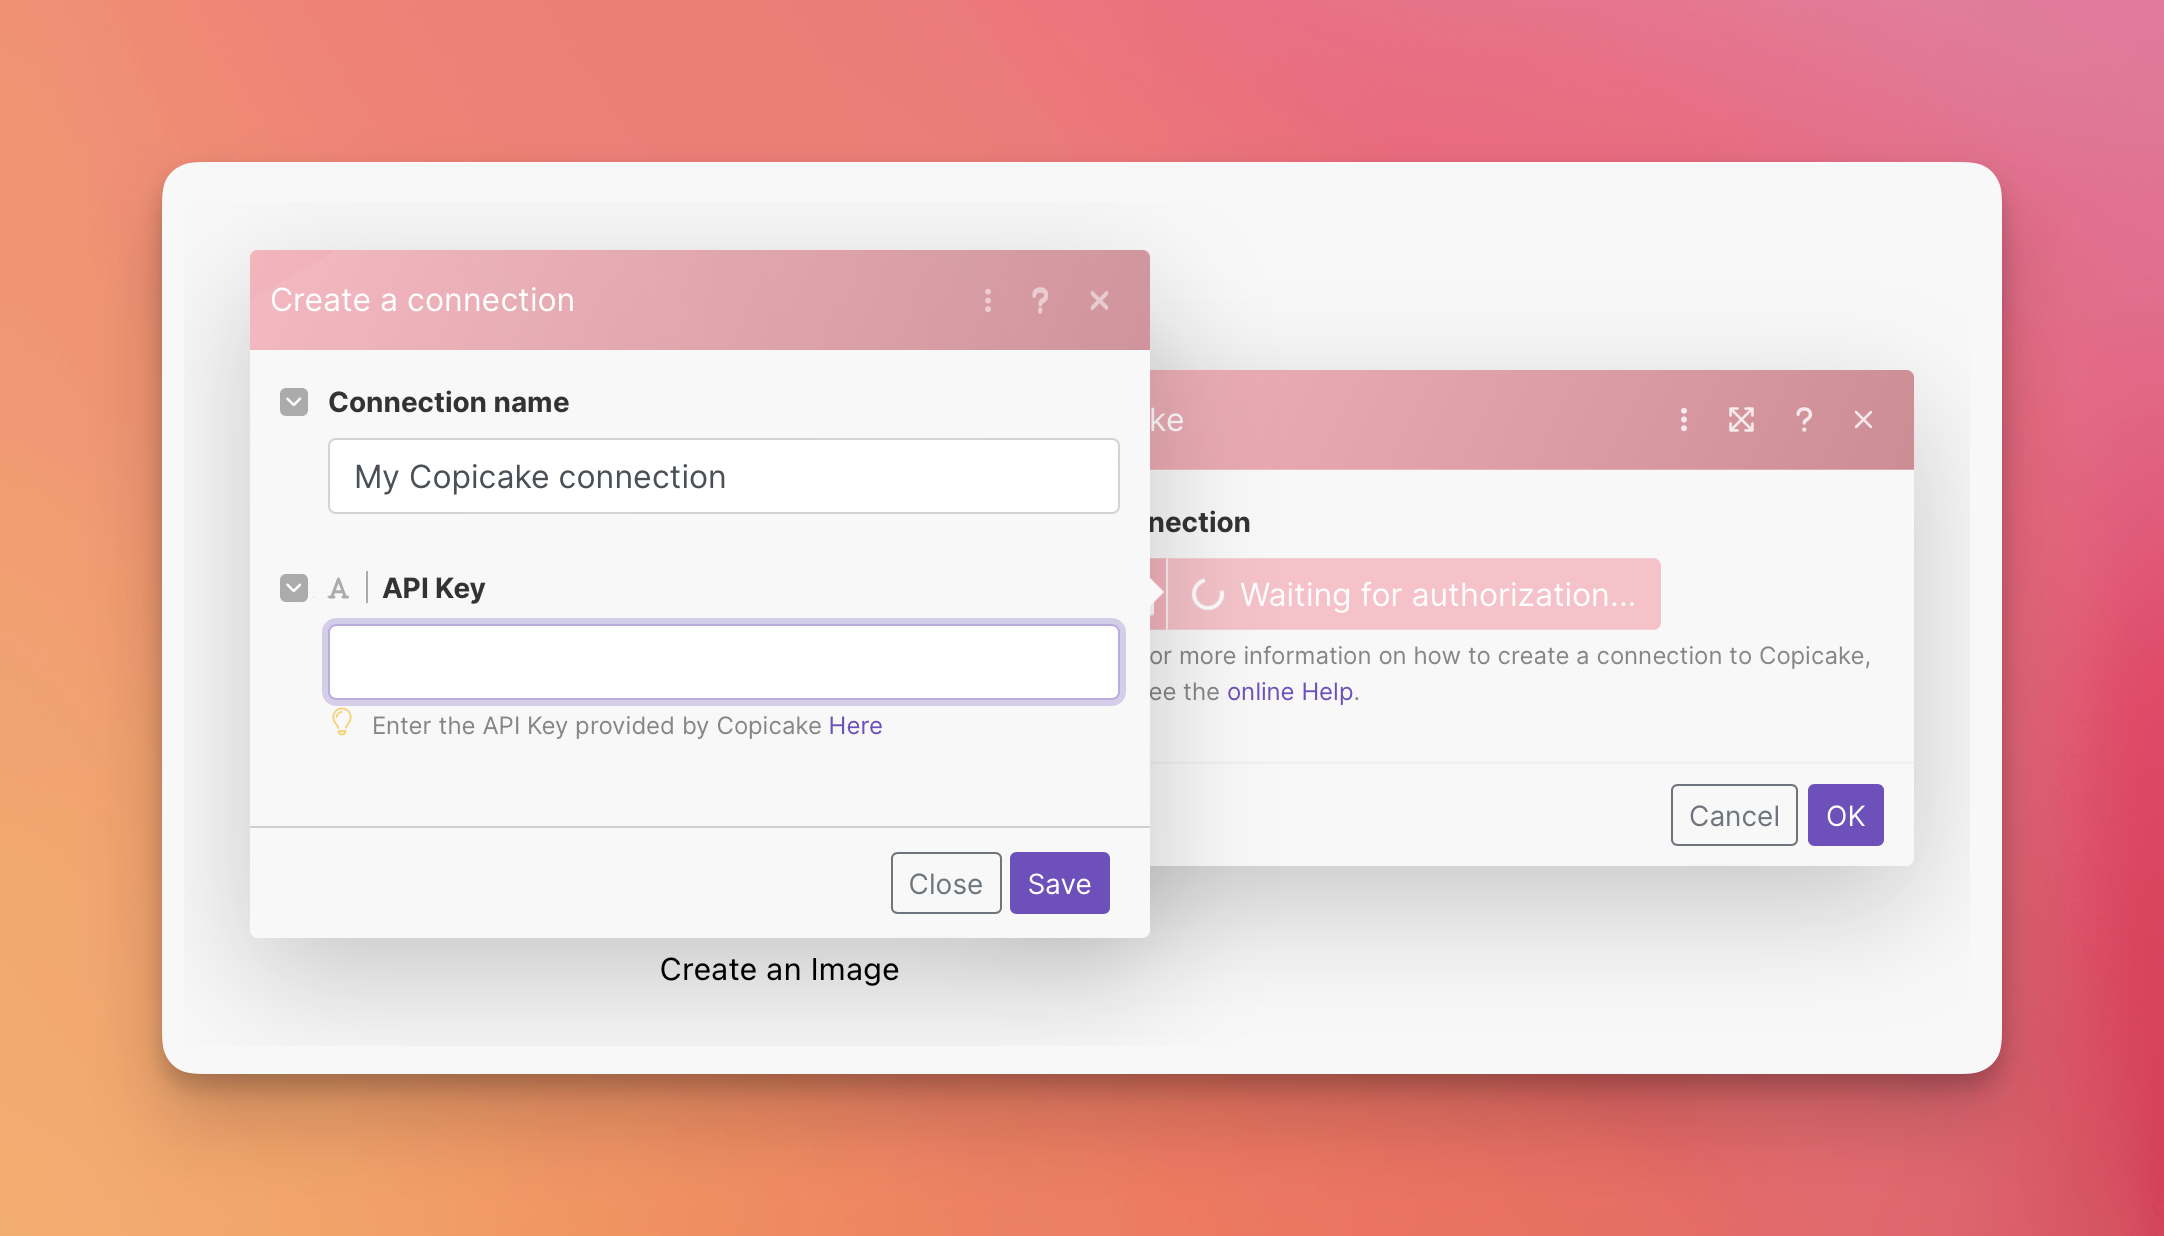
Here, you need to copy your API key from Copicake and paste it to the API key field. You can find your API key on Your profile page on Copicake.
Step 3: Create an image
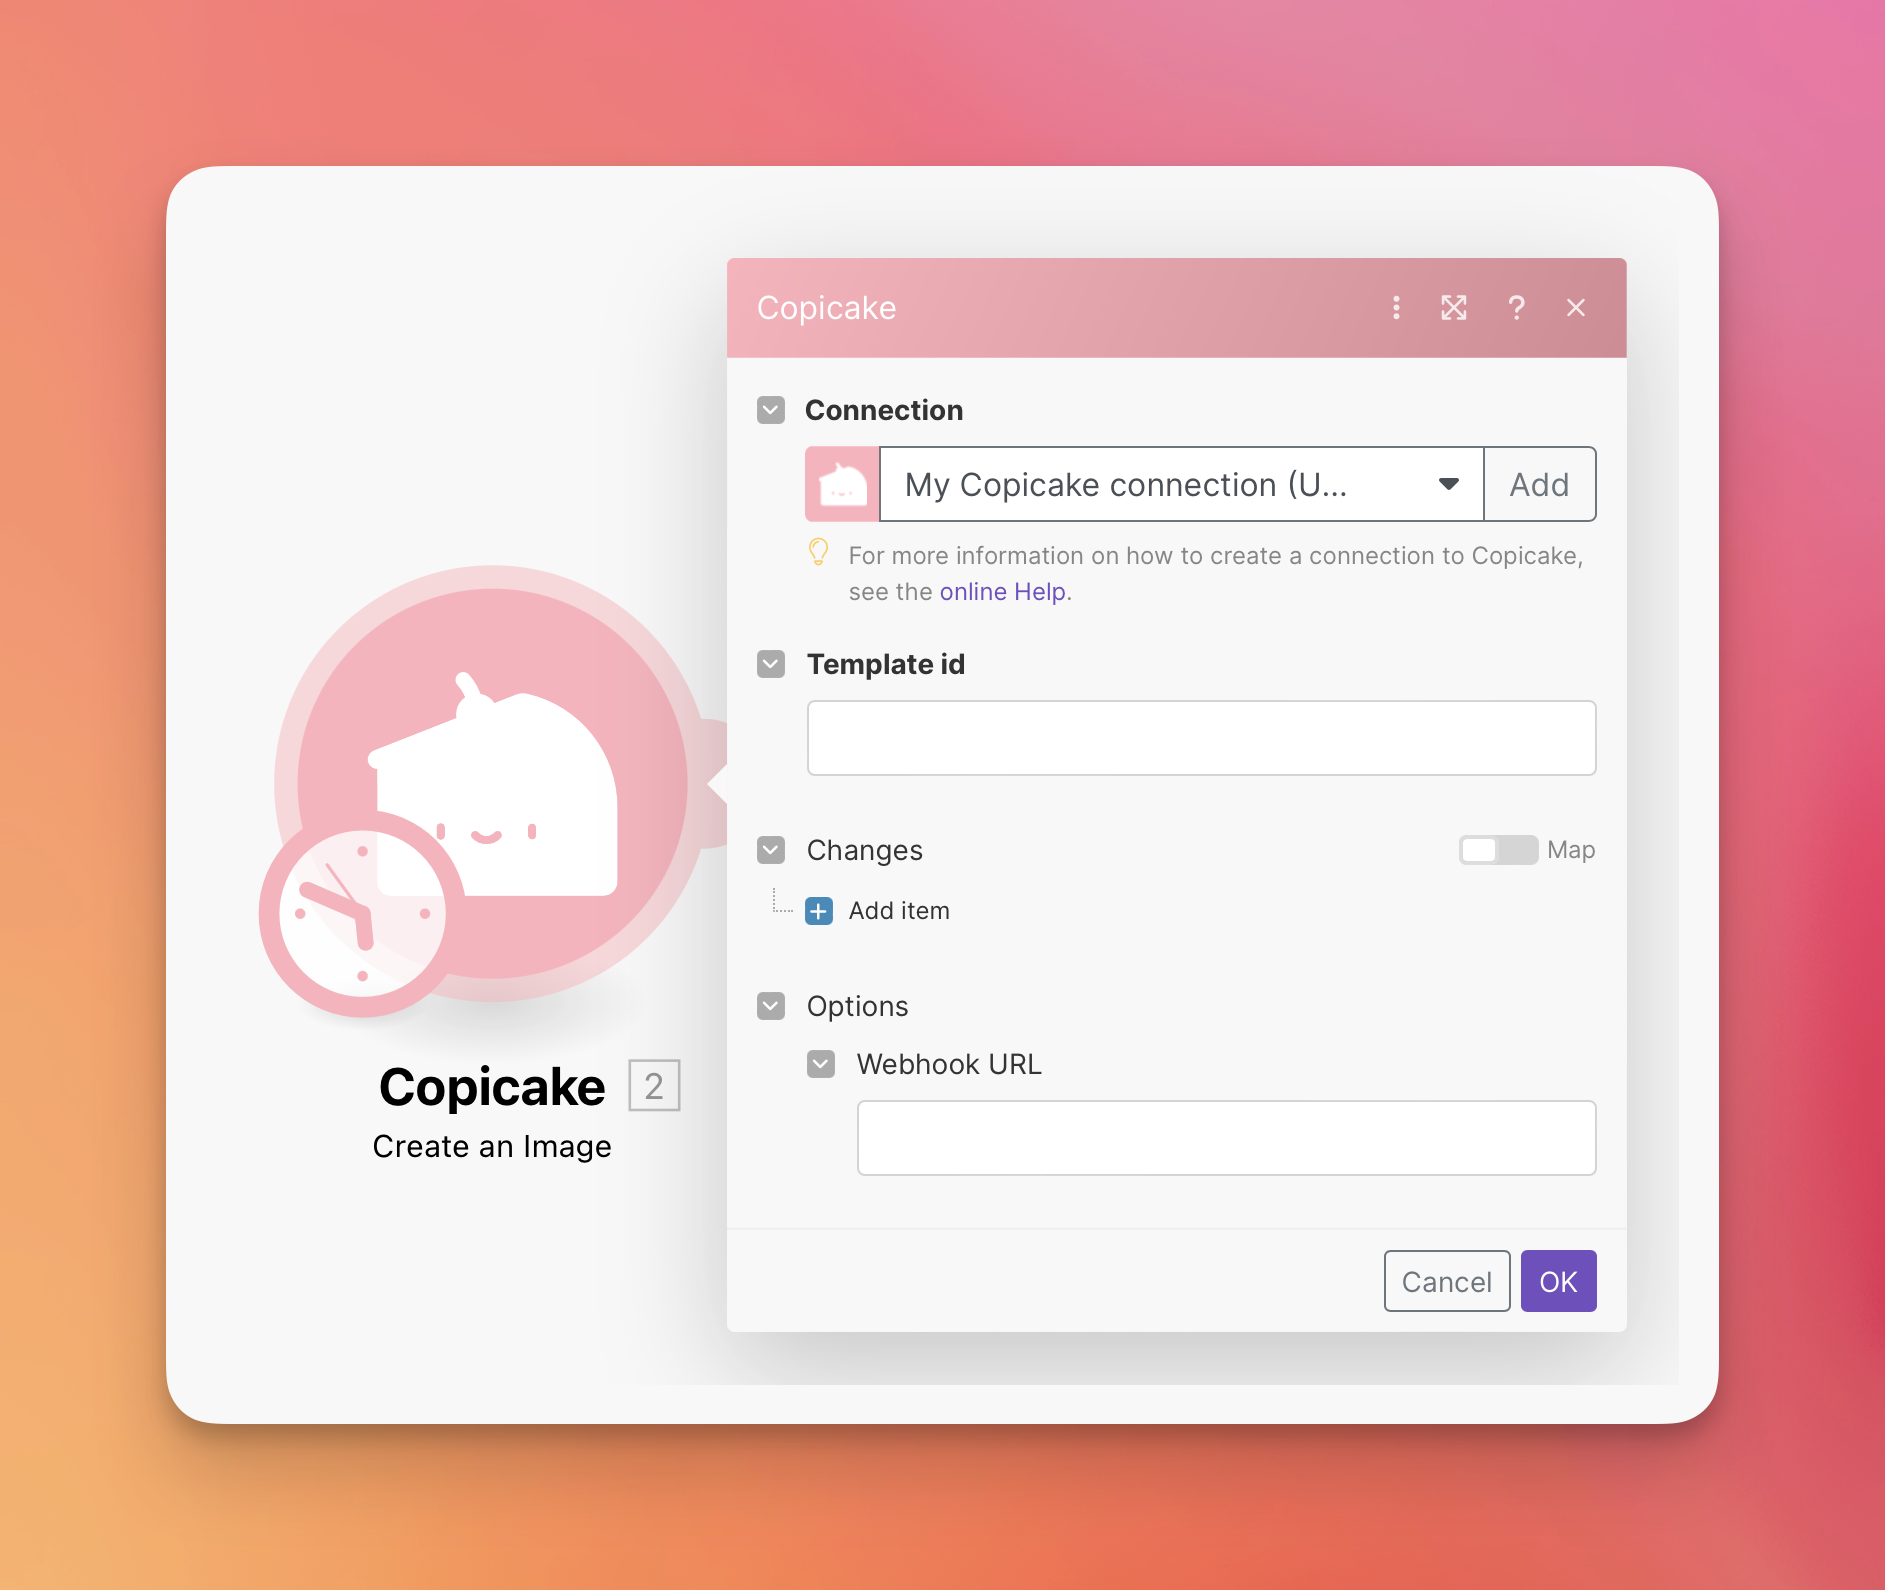
After connection is set up, we can start to create an image. As you can see, we have 3 fields that need to be filled:
- Template Id (required)
- Changes (optional)
- Options (optional)
For more details about each field, you can check our API documentation.
Step 3-1: Setup template id
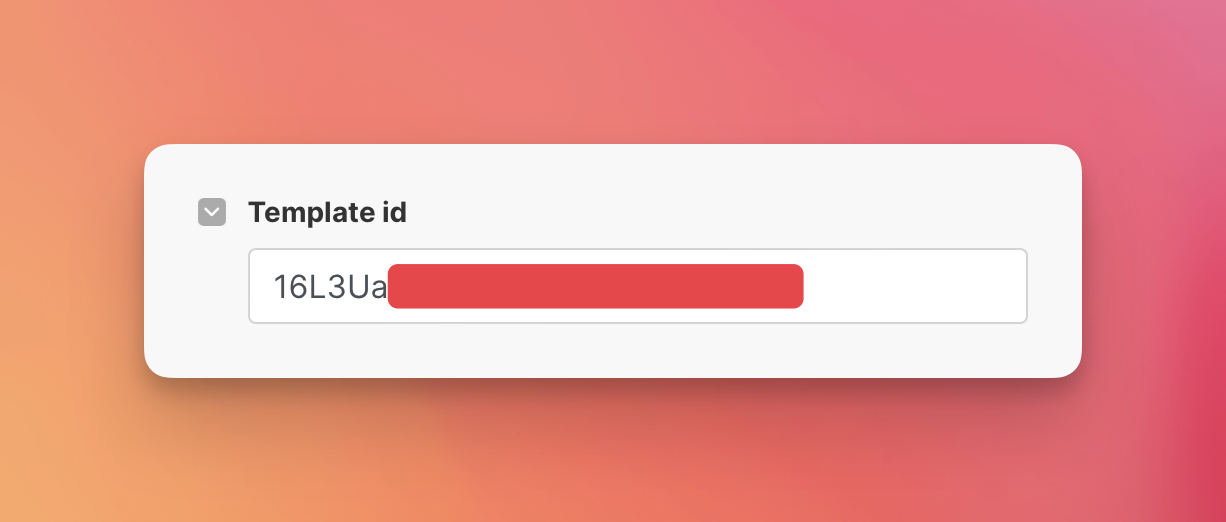
Each template you created on Copicake has a unique id, so you need to fill in the template id field with the id of the template you want to use.
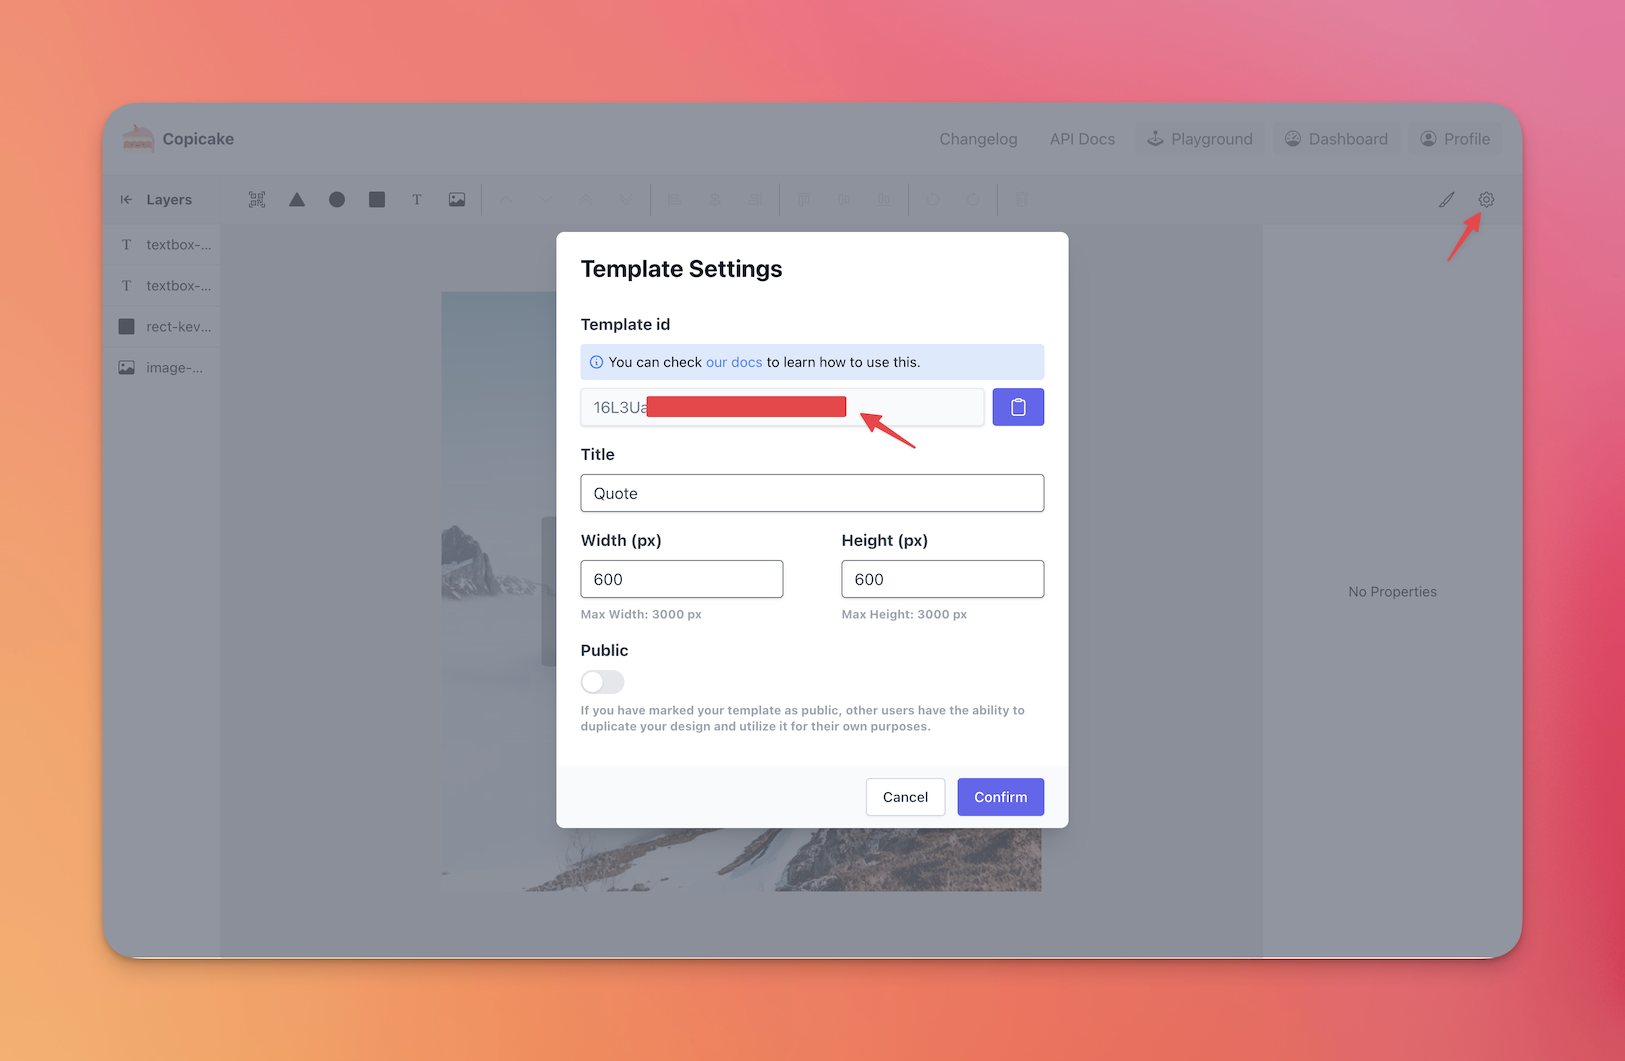
You can find the template id by:
- Go to Copicake editor - https://editor.copicake.com/
- Choose your template
- Click the "Settings" button on the top right corner
- You'll see the template id on the popup window like this:
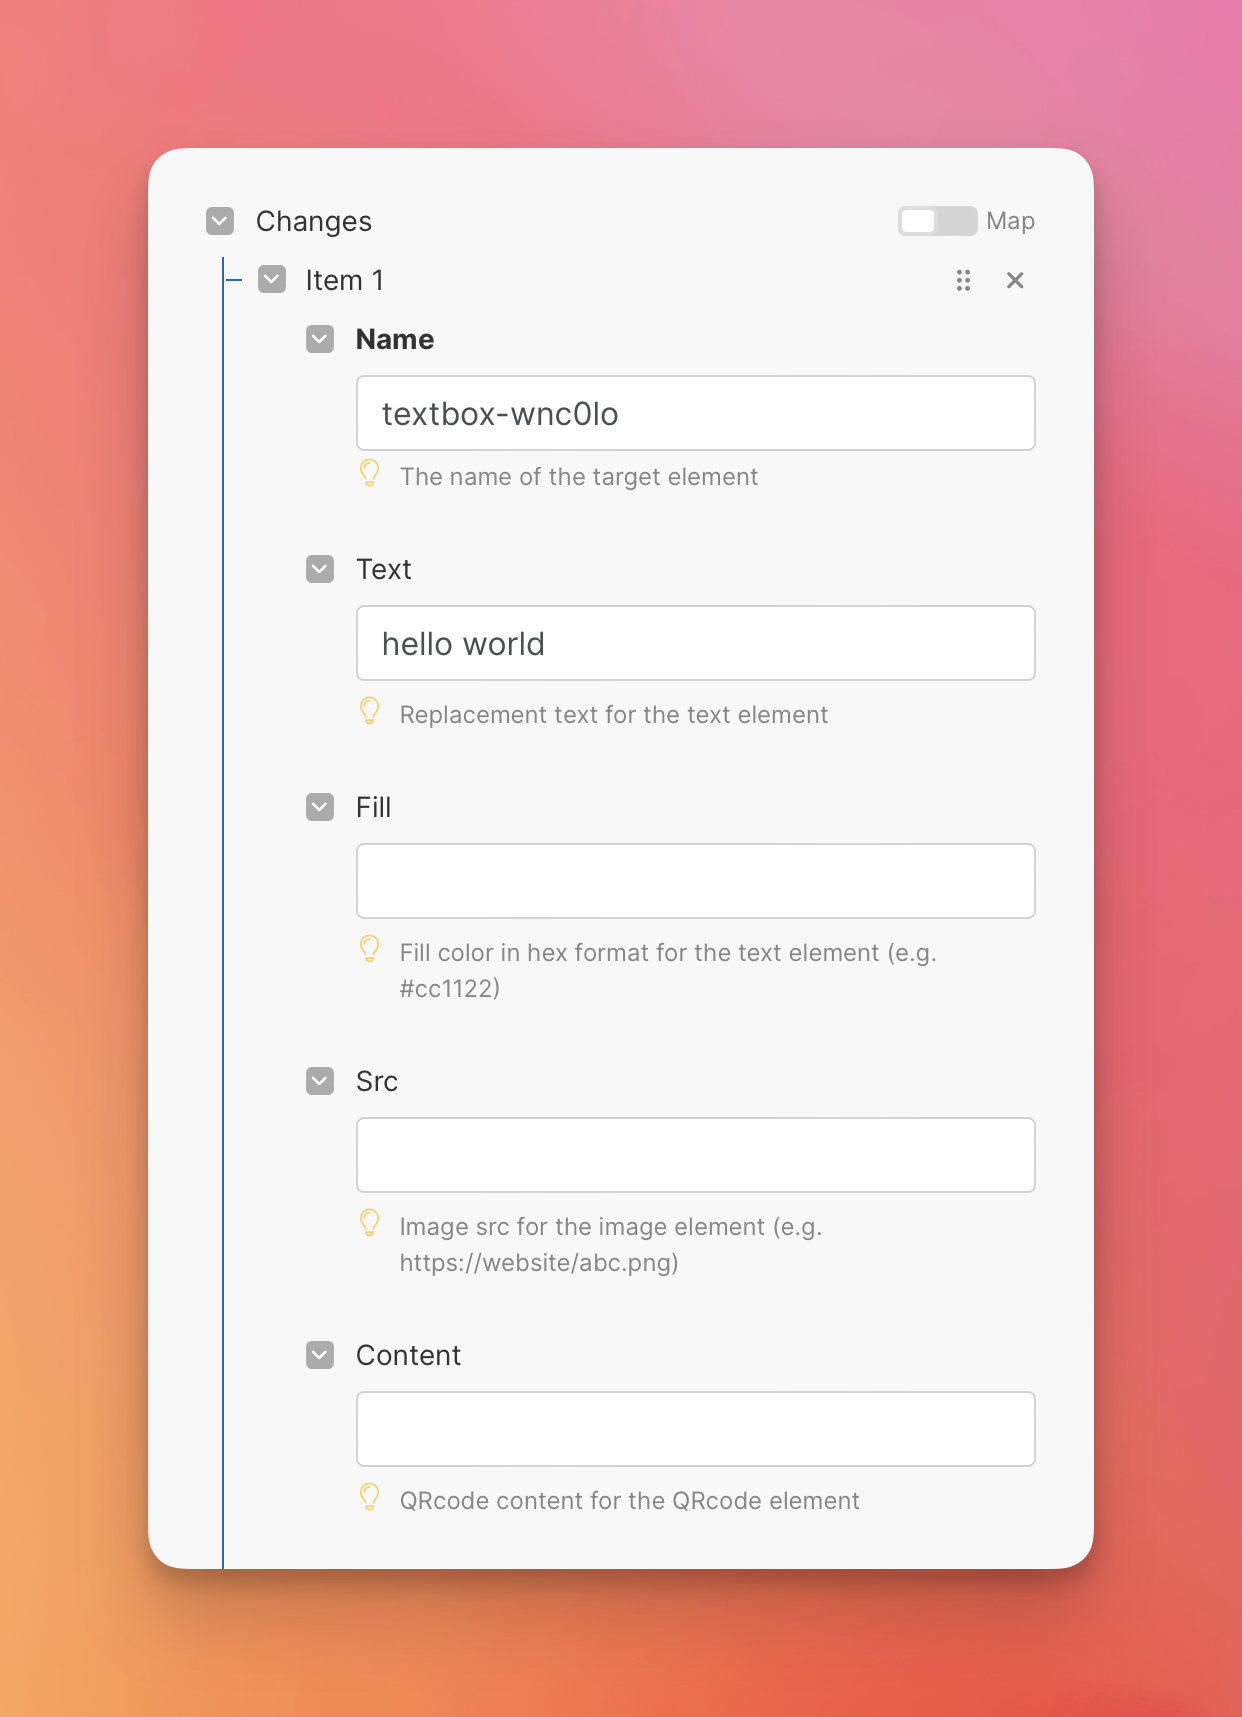
Step 3-2: Setup changes
After clicking Add item button from Changes' dropdown, you will be able to create a change item. And based on your use case, you can add as many changes as you want.
For simplicity, we aggregate all the fields here in the UI, so please remember to always provide the only needed fields for each change item. (For example, if you put Src for Text Change, it will be ignored because it is only available for Image Change)
So please check our documentation about changes when adding a new Change item. You would notice that we do support several types of changes and each type of change is with some shared fields and its own specific fields.
In this demo, we created one Text Change with two fields and this will replace the text on the template with the text we provided.
- Name = text-wnc0lo
- Text = hello world
Step 3-3: Setup options
If you want, you can also specify some extra options like webhook url. But for simplicity, we are going to skip this step.
Step 4: Get the image
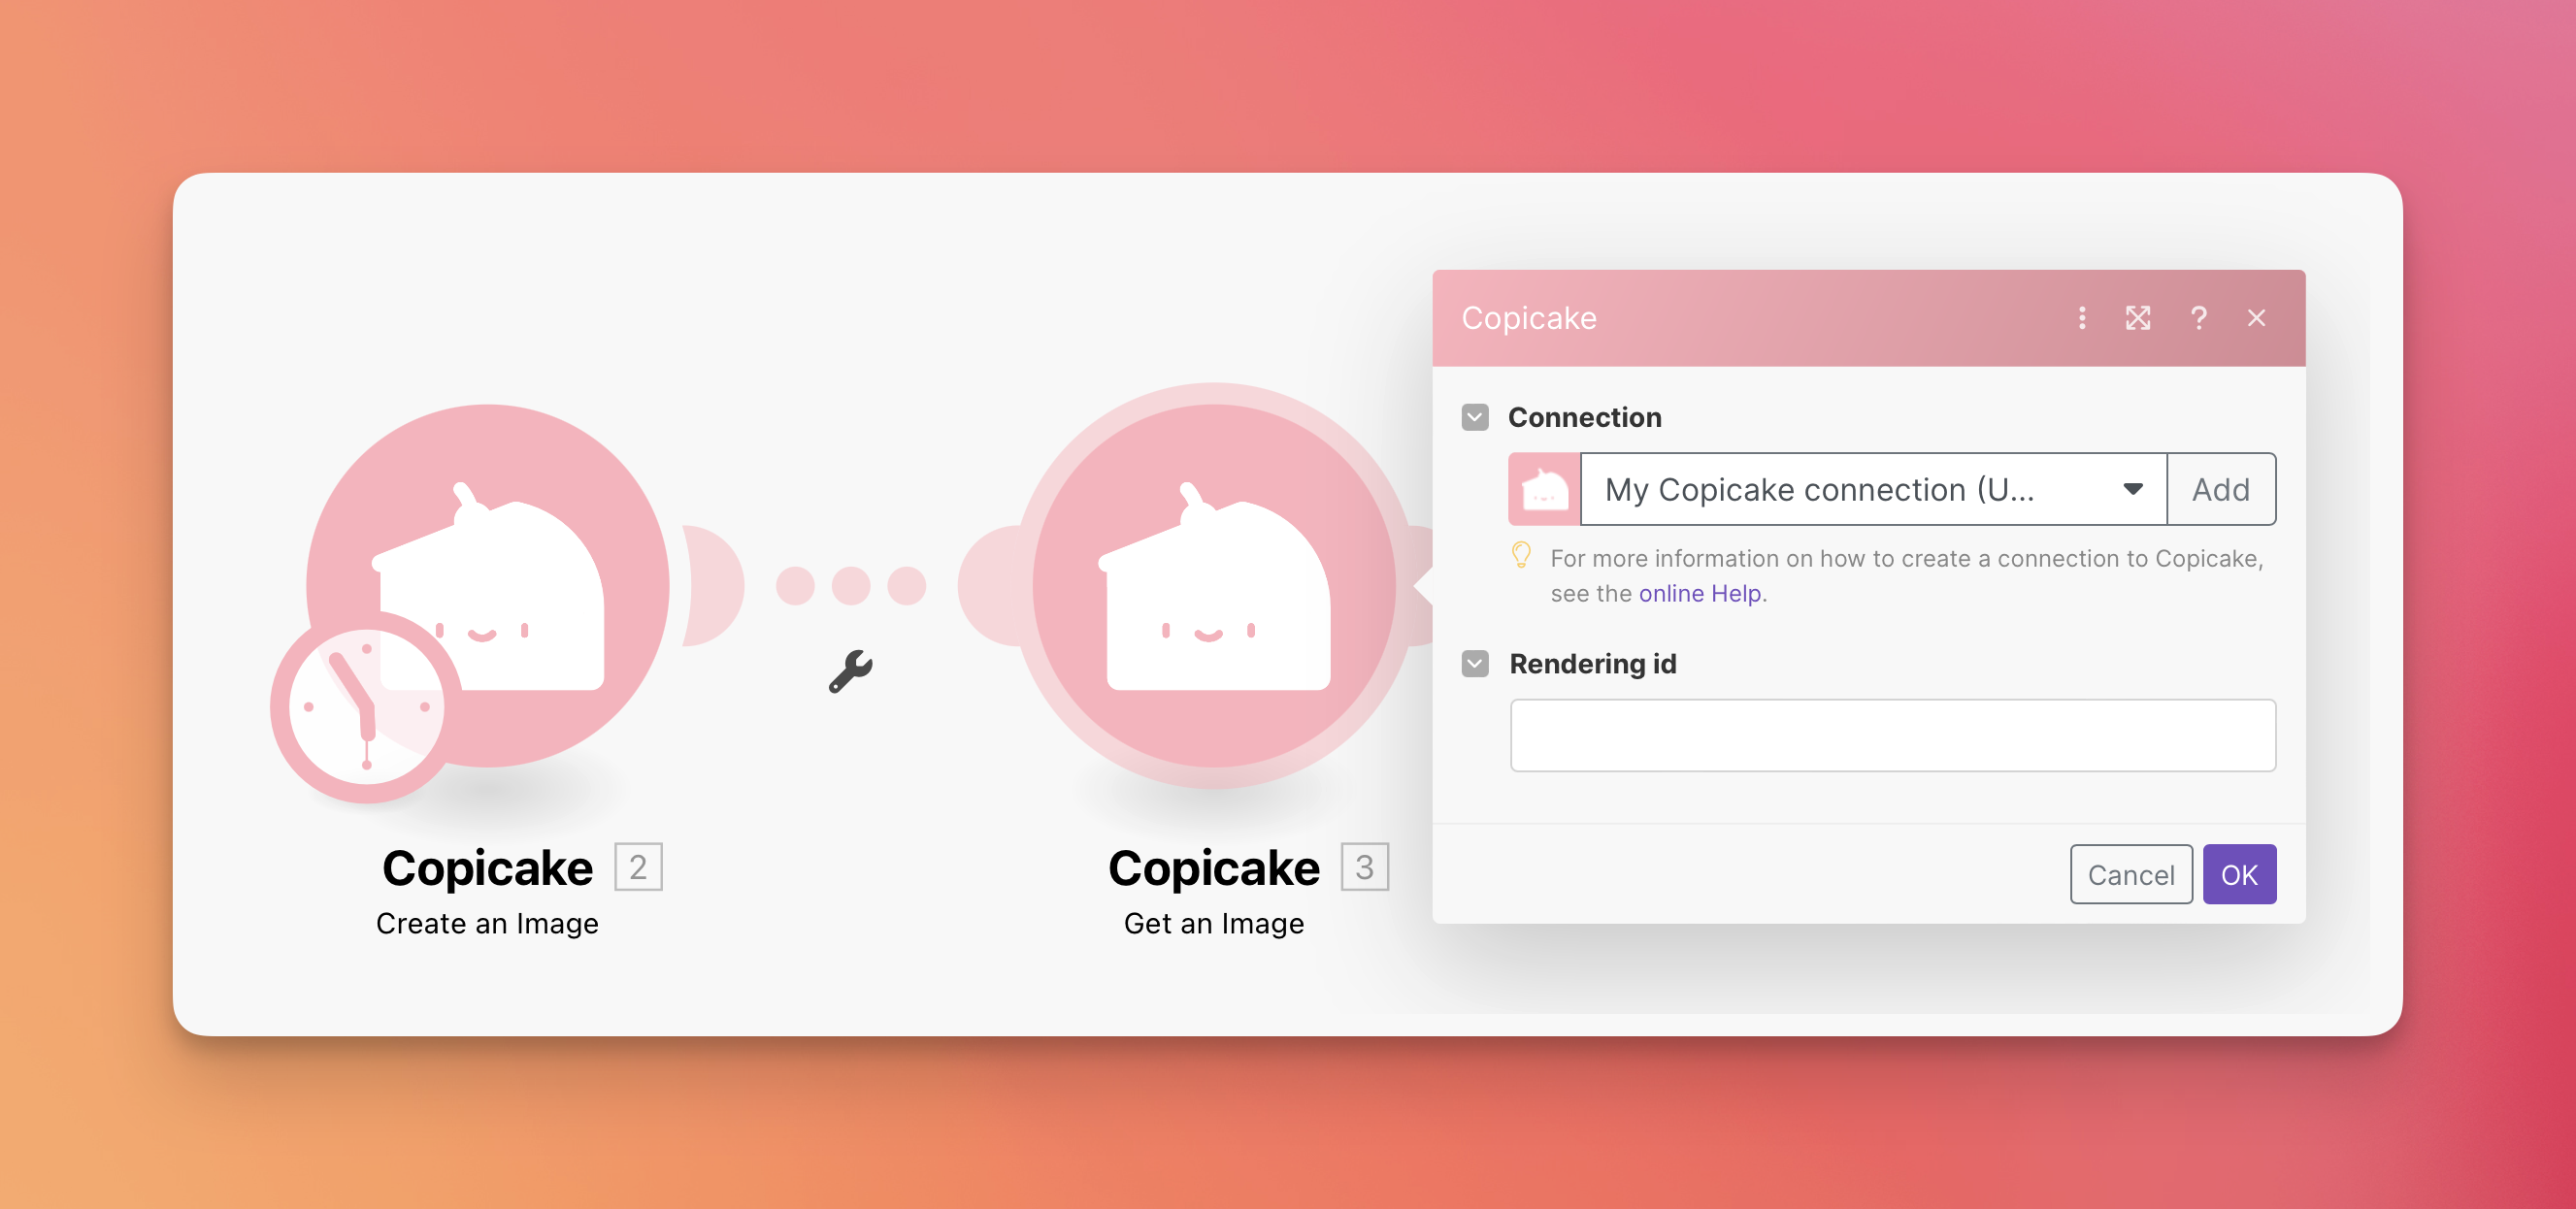
After setting up the "Create an image" action, it's time to get the rendered image. As you can see below, the only required field will be the Rendering id because this is the key to find the rendered image.
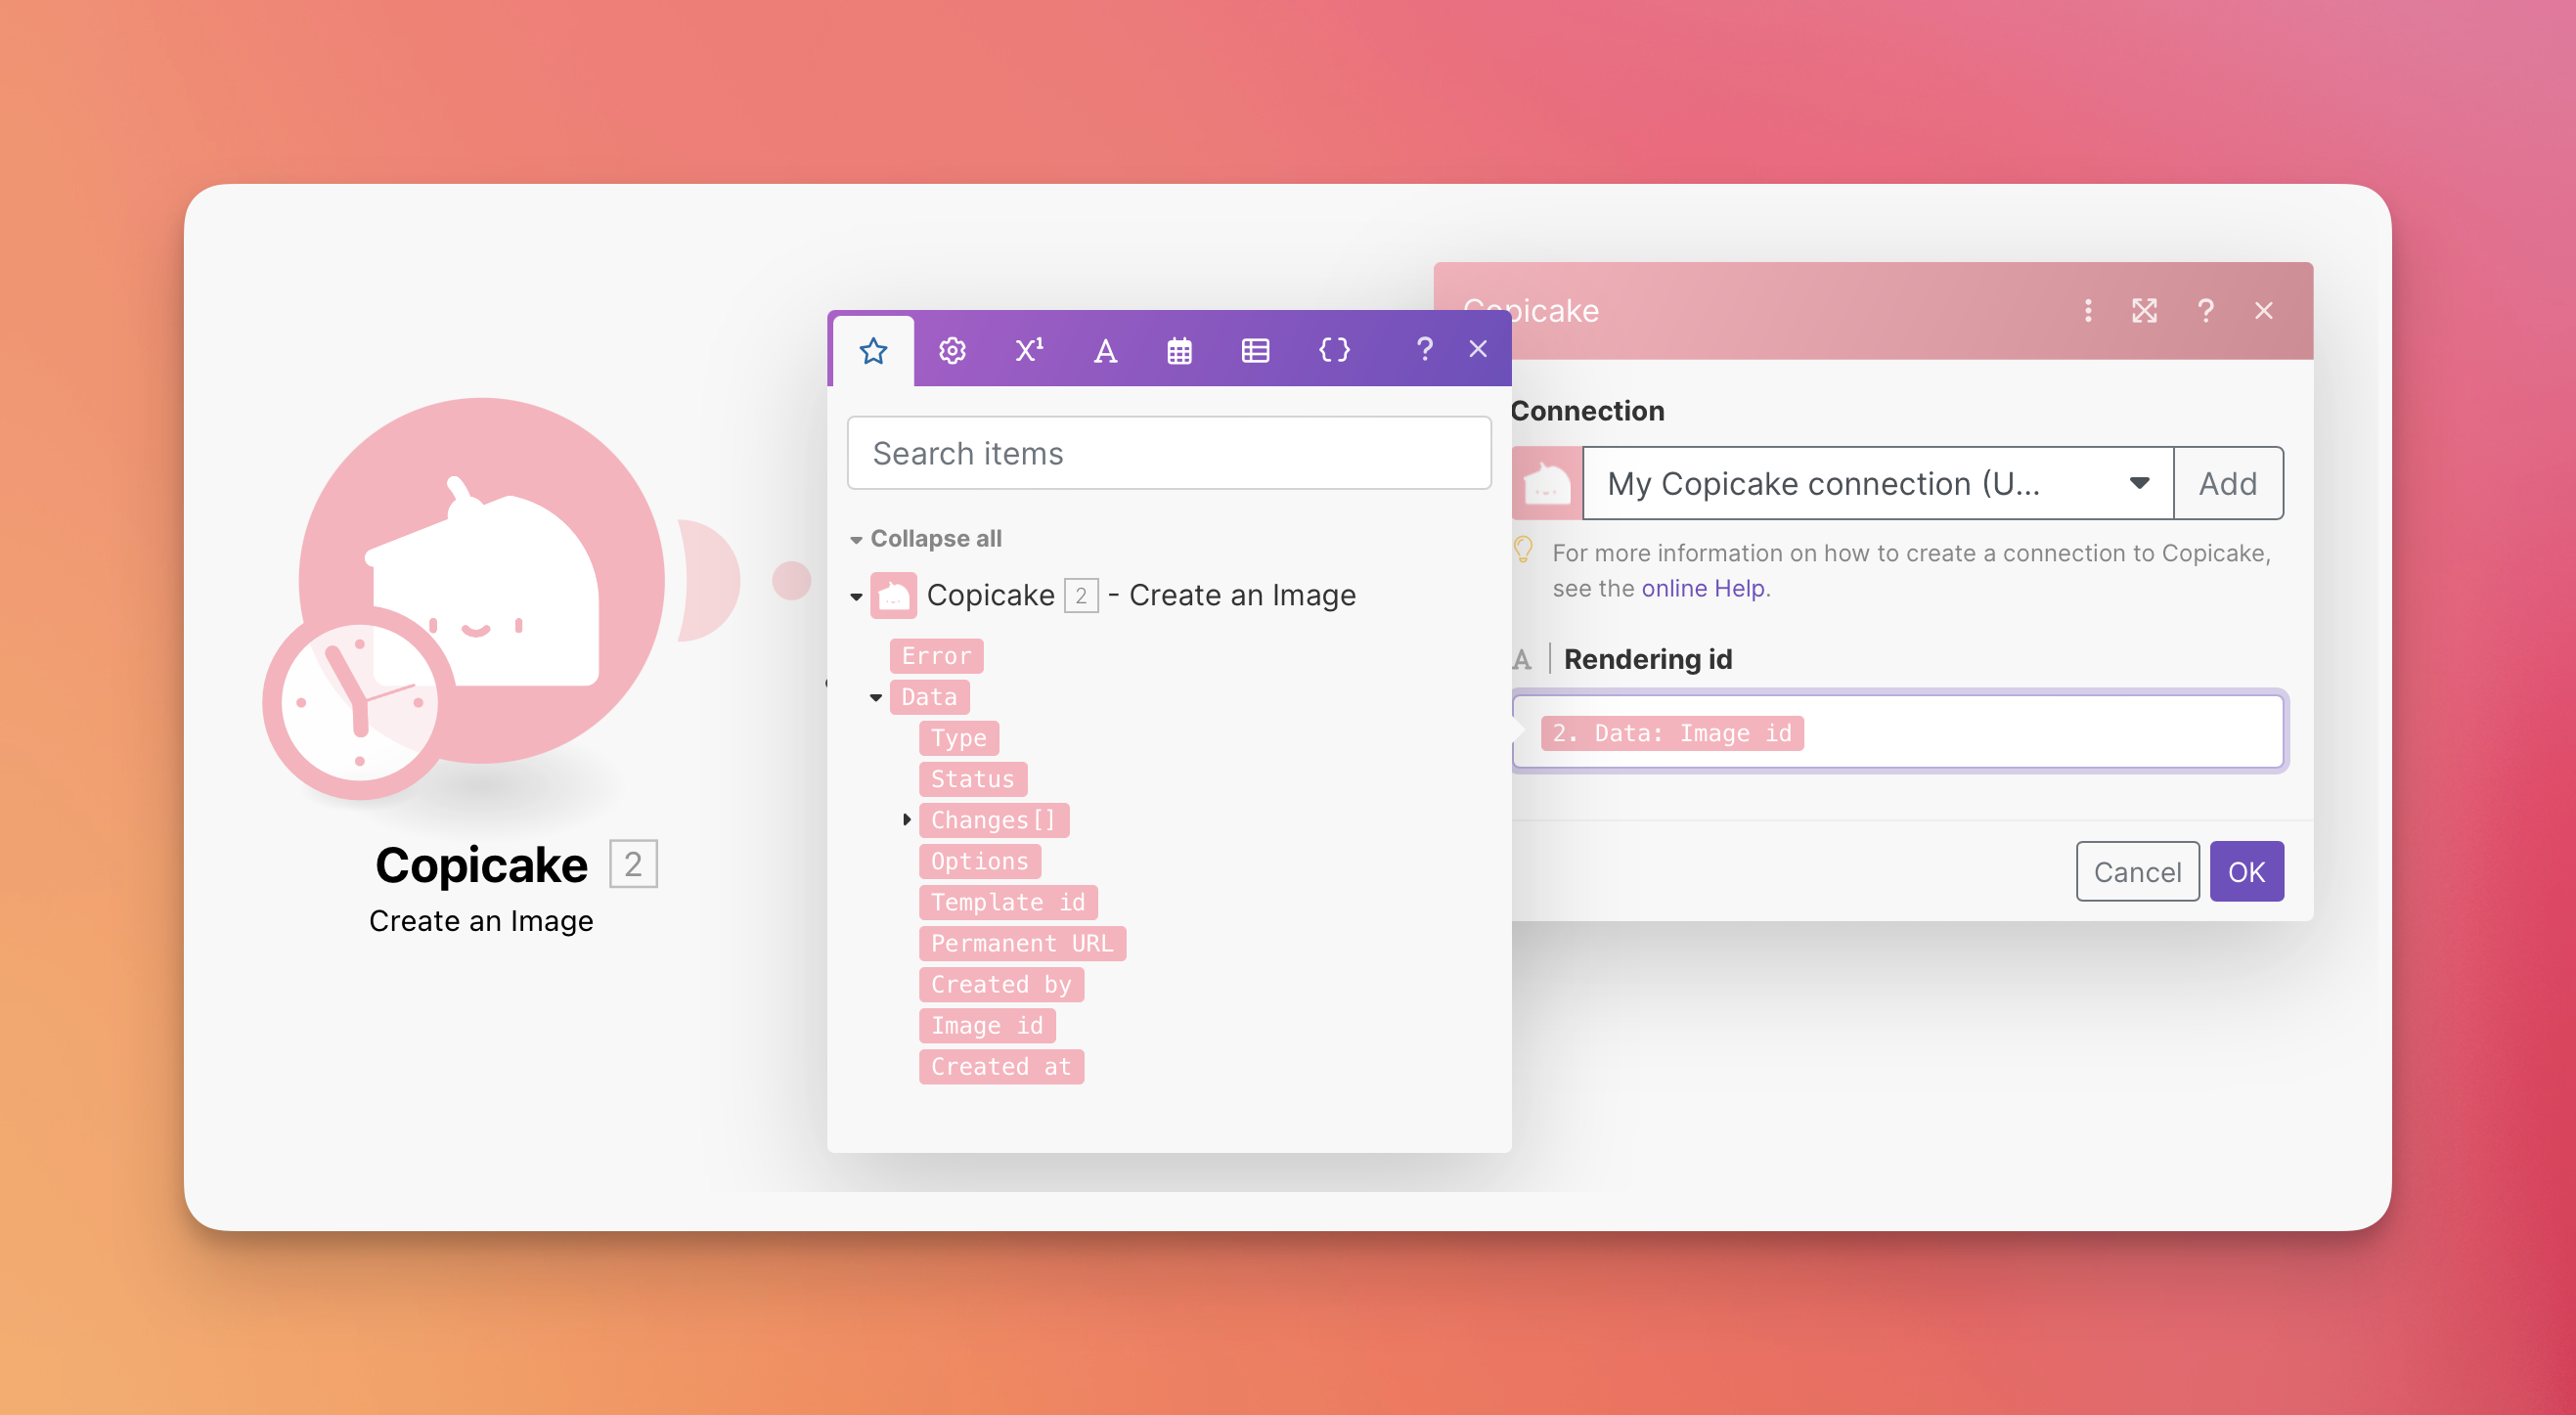
By clicking the Rendering id, you will see a popup window with all the output from the previous action. And what you need here is to use Image id as your Rendering id.
P.S. Every time you use the "Create an Image" action, you will always get a new Image id. So for automation works, you always need to use the generated Image id to get the rendered image.
If we put these two actions together, you can see how the final response looks like:
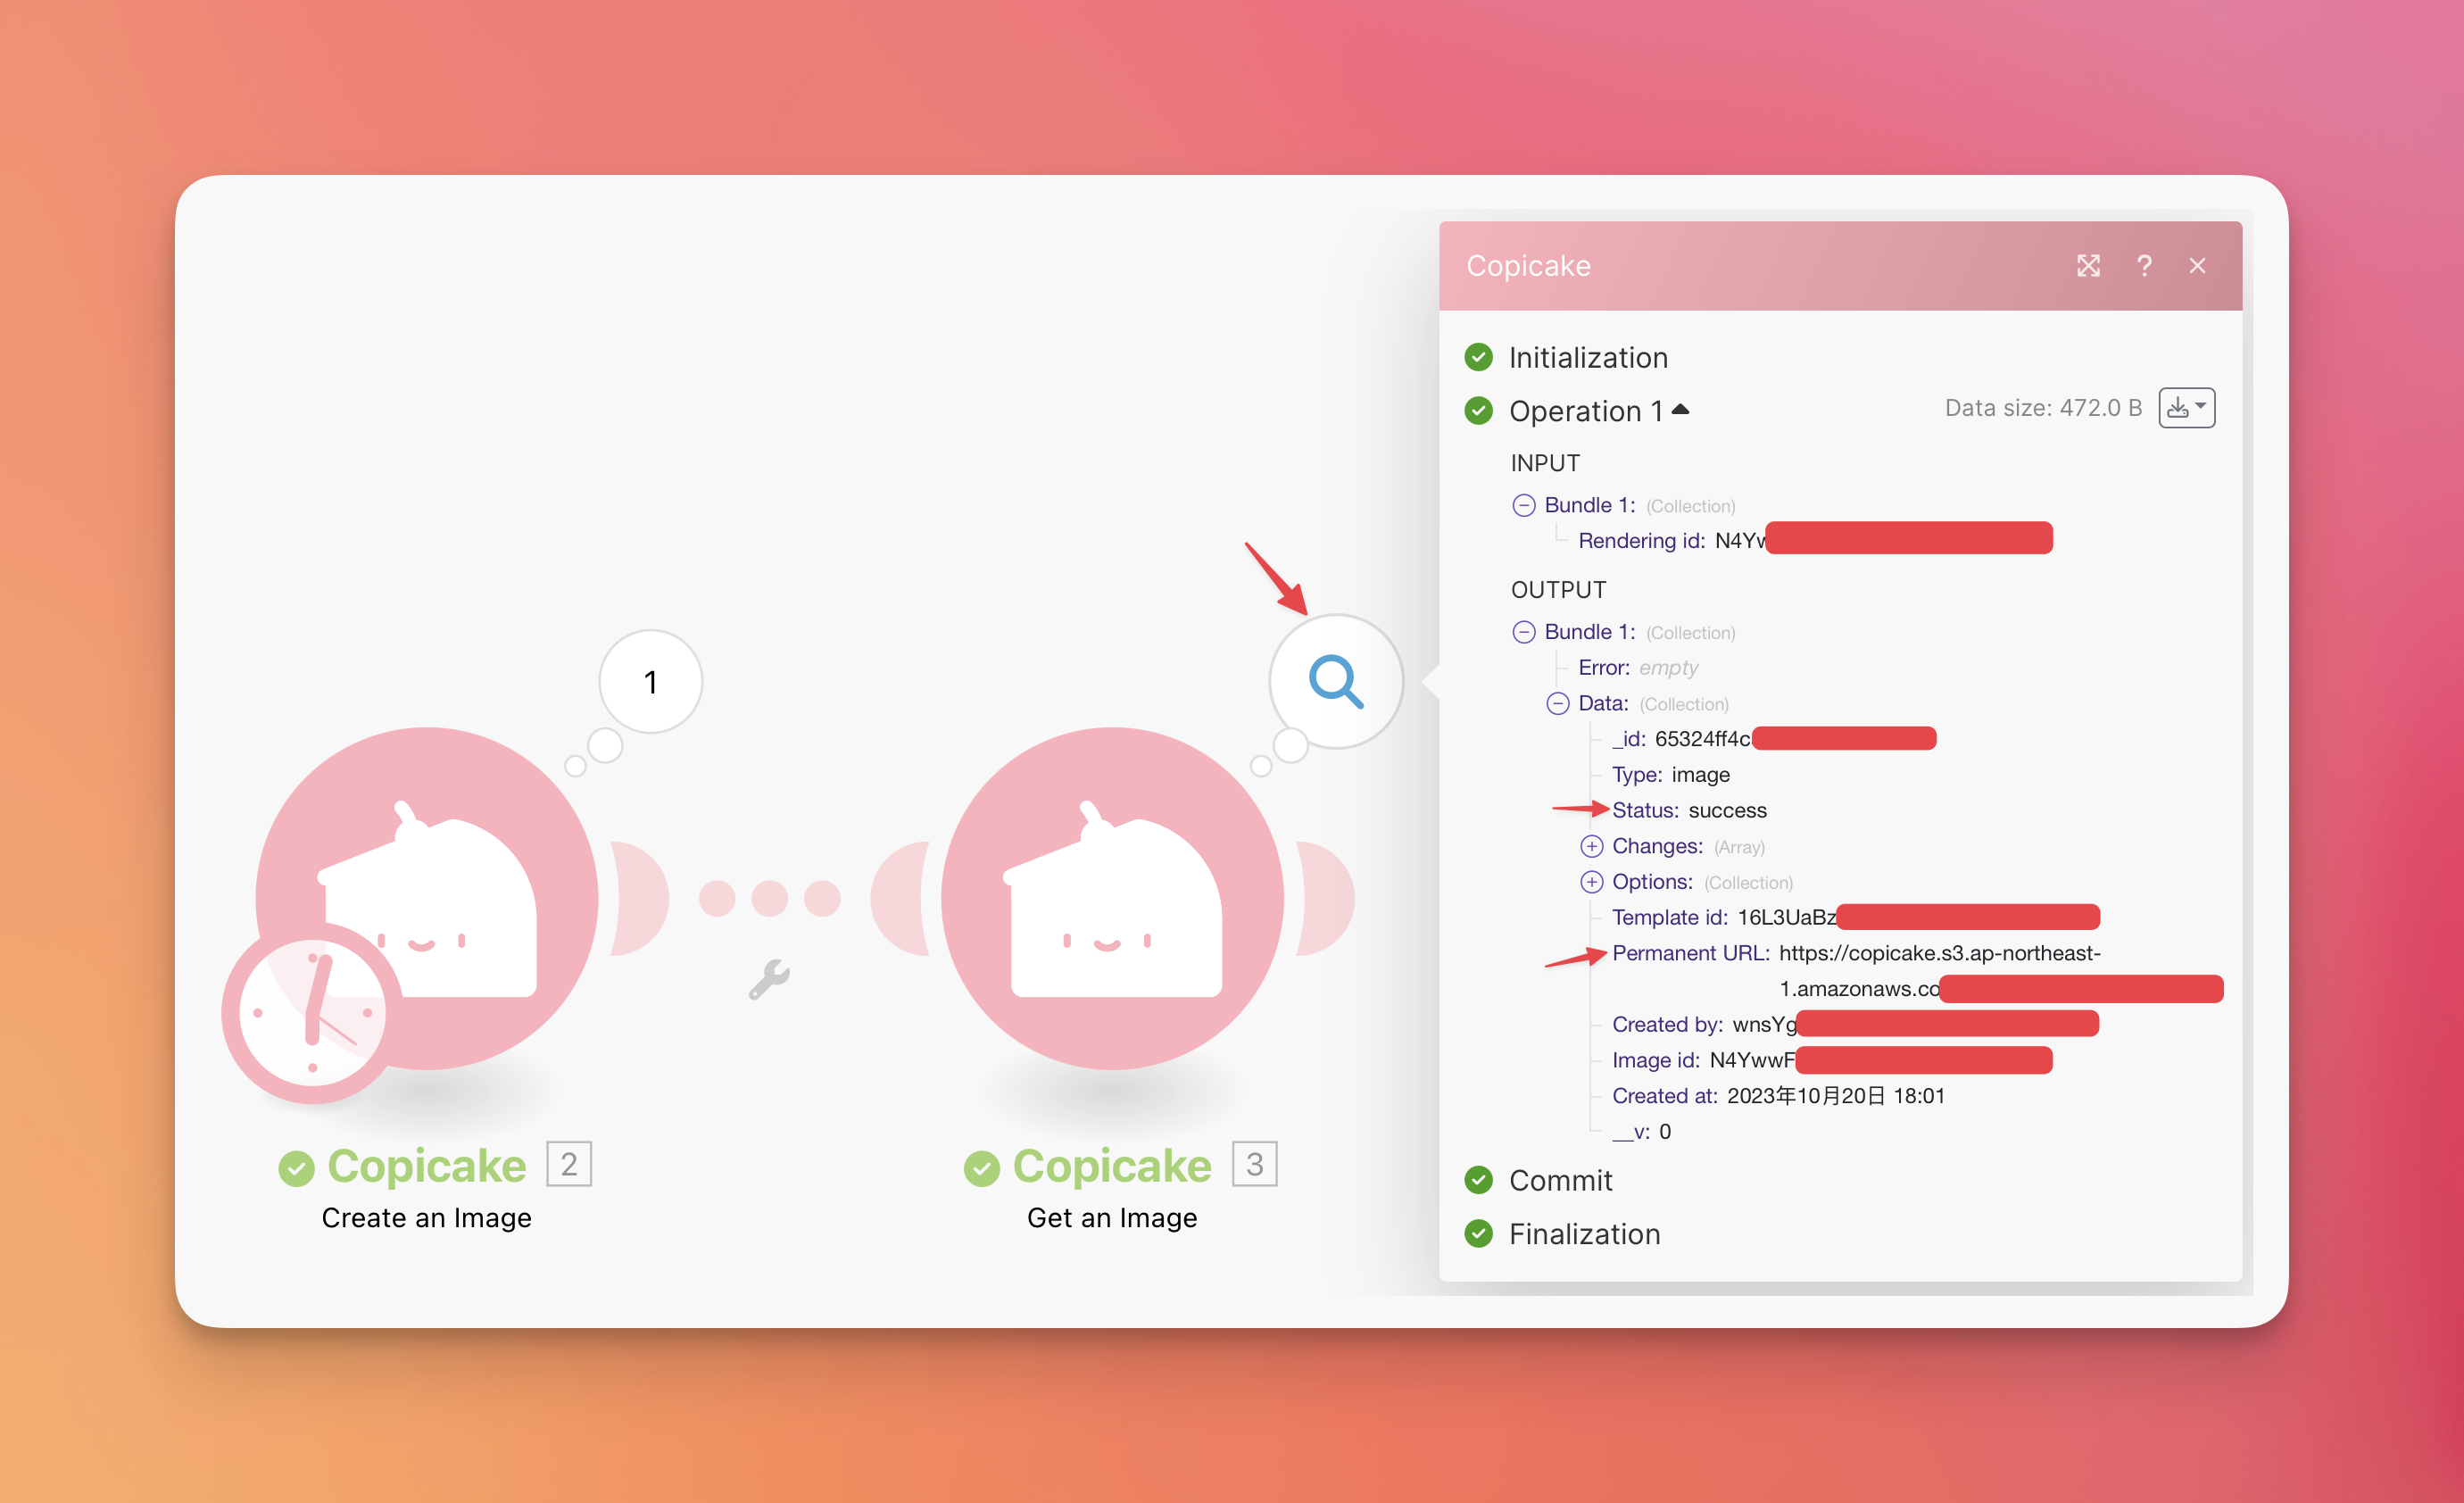
As you can see from the screenshot above, you can get the final Permanent URL for the rendered image and this will be the URL you can use to download the image.
Imagination is your only limit ⭐
So with these two actions, you can basically create images from any other services that Make.com supports.
For example, you can create a scenario that will create an image every time you receive a new email. Or you can create a scenario that will create an image every time you receive a new order from your Shopify store ... and more!
Right now you already know how to use Copicake on Make.com and I'll leave the rest to your imagination. If you have made any cool scenarios, please feel free to share with us!
I think that's all for today, and I'll see you next time. Happy copicaking! 🎂